
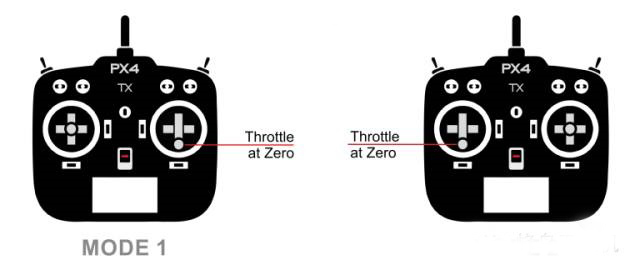
Figure 4 Left-hand throttle, right-hand throttle, right-hand throttle
The difference between the remote control "MODE 1" and the remote control "MODE 2" is to place the throttle channel on the left or right according to different people's hand preferences. It is recommended that you try and decide which of the above two types of remote controls to buy.
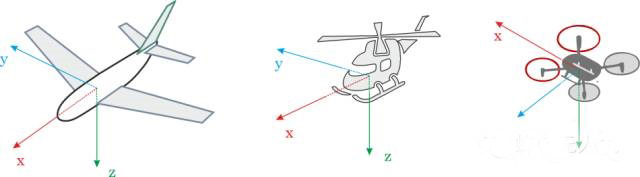
In order to control your aircraft, you need to know and deeply understand the basic Roll, Pitch, Yaw and Throttle commands and the motions these commands are applied to the aircraft in three-dimensional space. effect.
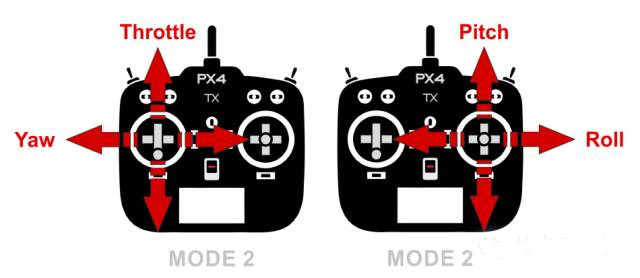
Figure 5 Corresponding channels for roll, pitch, yaw, and throttle commands
The above commands are applied to hoverable aircraft such as helicopters, multi-rotor and forward-facing aircraft such as fixed-wing aircraft, and the aircraft will produce different responses.
The basic movement of hoverable aircraft (such as helicopter, multi-rotor or vertical take-off and landing drone):
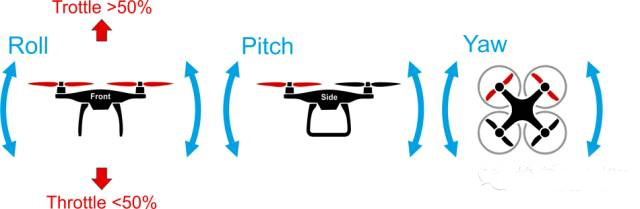
What needs to be kept in mind is that for hoverable aircraft (multi-axis drones, helicopters),
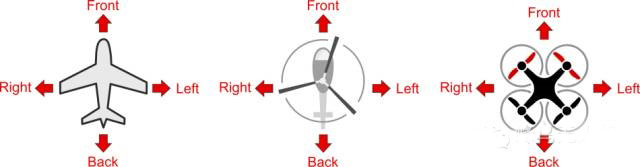
Roll command will produce left/right flight effect;
pitch command will produce forward/reverse flight effect;
Yaw command will produce a left/right rotation flight effect based on the center point of the aircraft.

Figure 7 The effect of control commands on fixed wing control
What needs to be kept in mind is that for forward flying vehicles (fixed-wing drones),
Roll command will produce left/right rotation and turning flight effects;
pitch command will produce up/down flight effect;
yaw command will produce left/right rotation of the tail and turning flight effects.
Using the above 4 basic commands, you can control your drone to fly in any direction in the air. The most important thing is that you will be able to perform the most important flight operations in the aircraft-take-off and landing.
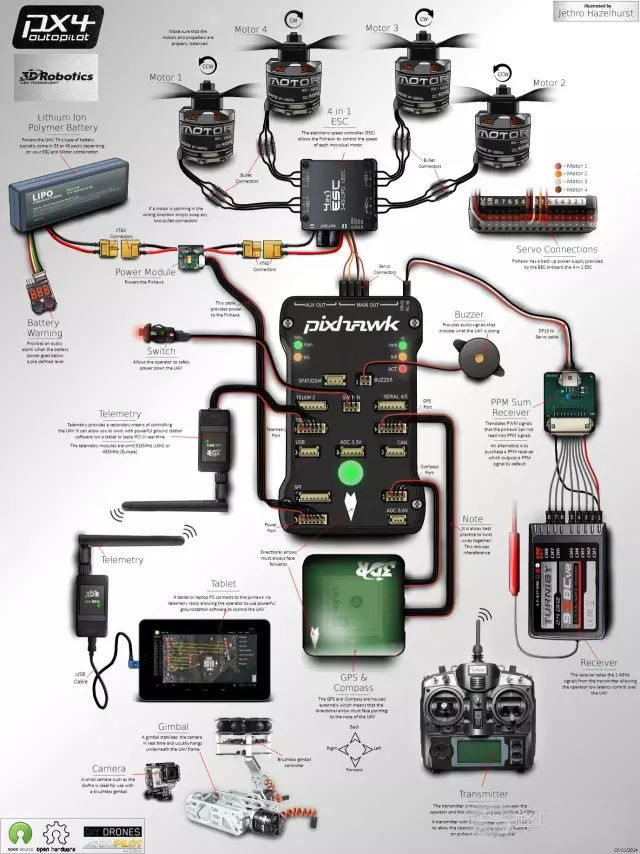
Since Pixhawk's built-in magnetometer is very close to other electronic devices, it is susceptible to electromagnetic interference.
In order to reduce this kind of interference, usually an external magnetometer can be connected to the flight controller, and try to keep the magnetometer away from other electronic devices on the aircraft.
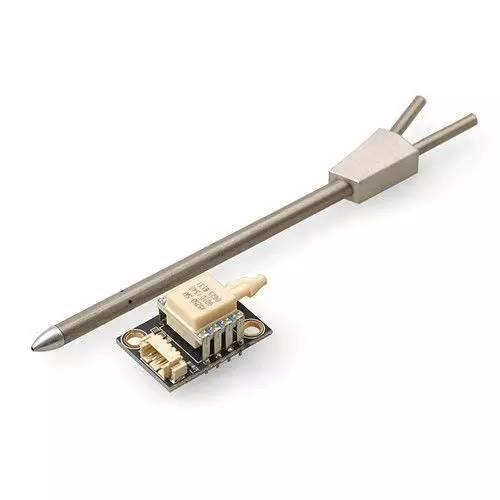
Airspeed sensor is mandatory for most fixed-wing UAVs and vertical take-off and landing UAVs. The airspeed sensor is so important because the PX4 autopilot has no other means to detect stalls other than the airspeed indicator. It is recommended to use a digital airspeed sensor.
Airspeed meter

QGroundControl runs on the above-listed platform devices, and the PX4 firmware runs on Pixhawk flight control.
Schematic diagram of ground station connection to flight control
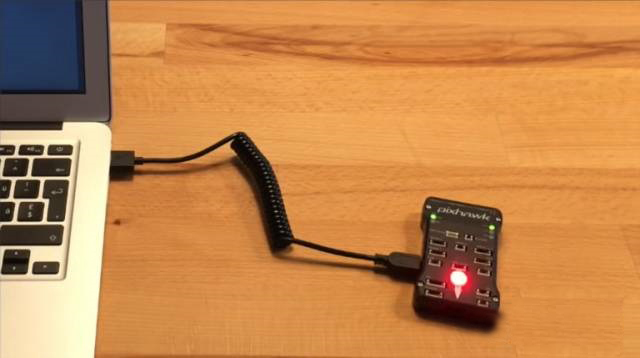
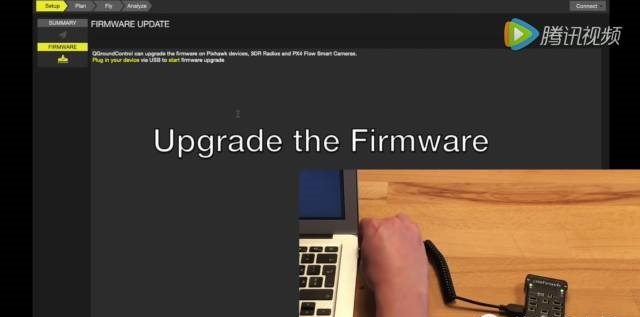
Use a computer or mobile terminal to download the QGroundControl ground station of the corresponding platform. After completing the QGroundControl installation, connect to the Pixhawk flight control, and you can start to configure the autopilot PX4.
QGroundControl download link
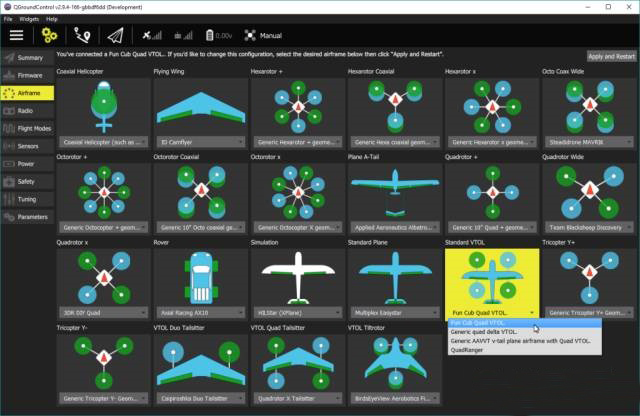
Please master the following postures for the configuration of PX4 autopilot:
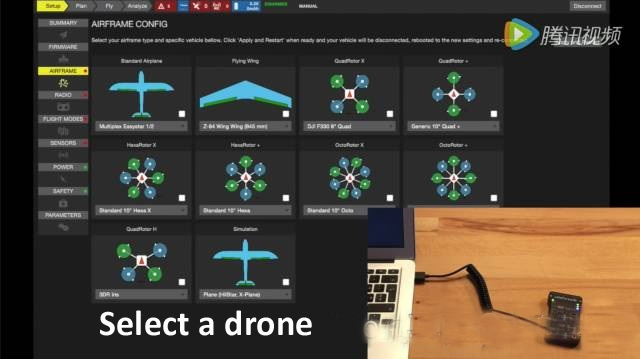
Frame selection, you can choose helicopters, multi-rotors, vertical take-off and landing drones, etc.
Calibrate the sensor of the autopilot and choose the correct orientation of the autopilot
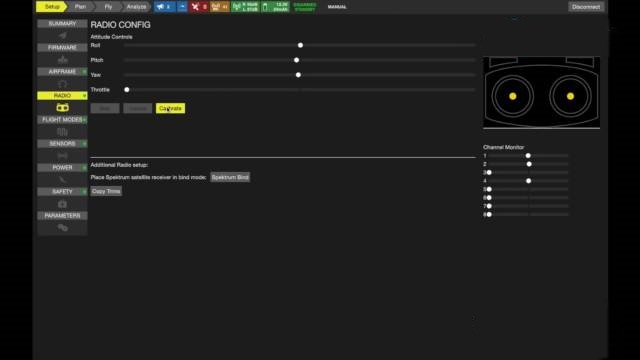
Calibrate the remote control
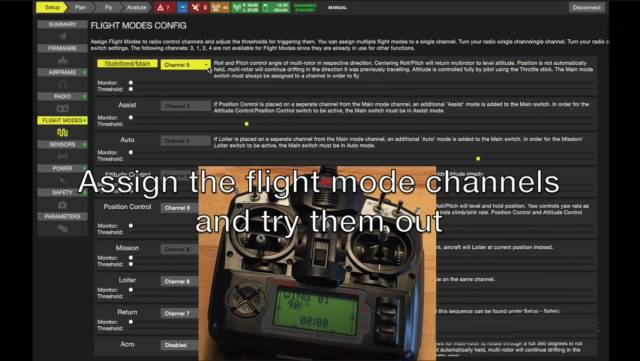
Configure the switch on the remote control to control the flight mode
In addition, there are many items that can be configured using the ground station, but the above steps are essential
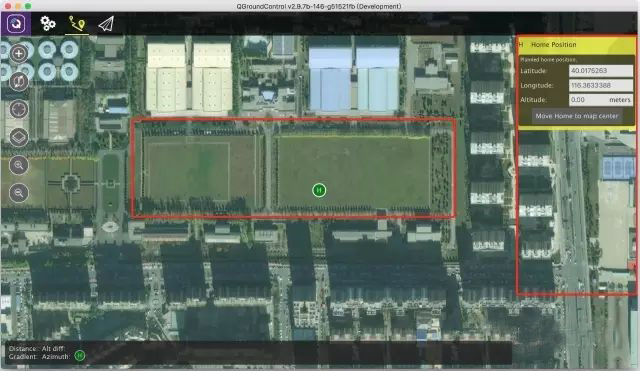
It should be noted that you only need to click the plus sign in the upper left corner once to set multiple waypoints by clicking on the screen multiple times, and the route will be automatically generated according to the order of the waypoints.
Each waypoint information will be displayed on the right side of the ground station. At the same time, the stay time, relative altitude and other information of the waypoint can be edited.
For example, in the following figure, the drone will stay at waypoint 6 for 0 seconds, and the height relative to the home position is 25 meters.
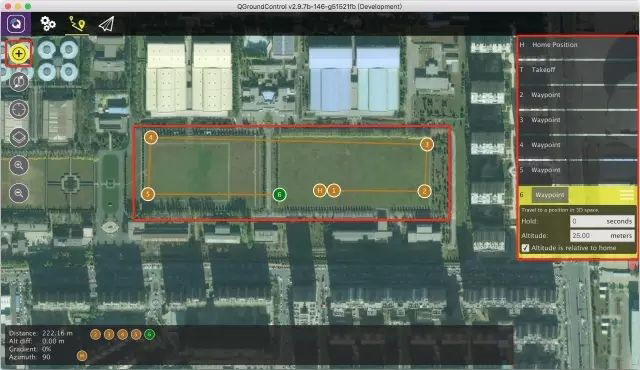
The bottom of the task view shows the relative distance (Distance), relative height (Alt diff), and gradient (Gradient) between each waypoint and the previous waypoint.
For example, the relative distance between waypoint 1 and waypoint 2 is 176.76 meters, and the relative height is 25 meters, so the inclination is tanα=25/176.76≈14%.
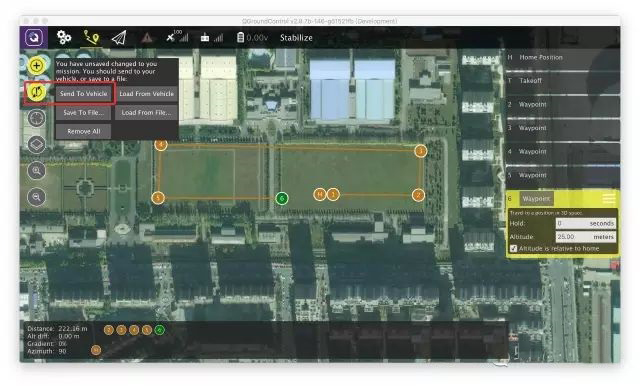
After the above operations, click the Send To Vehicle button in the upper left corner to send the planned mission to the drone.
Send flight mission to drone
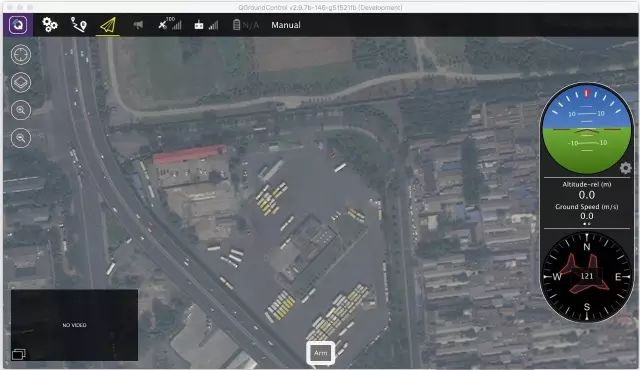
After completing the above mission planning and mission upload, switch the ground station to the flight view and unlock the PX4 drone. The drone can automatically follow the planned mission path and the ground station will display the drone's flight trajectory in real time.
Contact: Fly Dragon Drone Tech.
Email: frank at dronefromchina.com
Add: NO. 9 Dayu Road PiDu distric, ChengDu 611730, China